Tips
The Best Professional Headshot Poses: 5 Modern Poses + Variations for 2026
The 5 fundamentals that fix most amateur poses, 5 modern poses with variations worth practicing, and a quick map of which pose fits which role. Capture once at home, pick the best one.

Your pose carries most of the trust signal in a headshot at thumbnail size. Lighting and background do the heavy lifting on whether the photo reads as professional. But pose is what tells a viewer whether they're looking at someone who knows what they're doing, someone approachable, someone in charge, or someone who got their photo taken under duress.
Most amateur headshots fail on five small things: body angle, chin position, shoulder height, lean, and eye contact. Fix those and the same photo upgrades a full category. Most people pose like they're posing. The fix is to stop performing the pose and start doing the thing the pose represents.
Below: the 5 fundamentals that fix 80% of pose issues, 5 modern pose categories with their variations, and a quick map of which pose fits which role. Capture multiple poses on your phone, pick the best one, and the rest of the production (lighting, background, polish) can be handled afterward.
What makes a good headshot pose?
A pose that puts your body at 30 to 45 degrees from the camera, your chin slightly forward and down, your shoulders dropped and relaxed, a small lean toward the lens, and direct eye contact with the camera. Five adjustments, none of them complicated, all of them invisible when done right.
The 5 fundamentals every good pose has

Most headshot pose advice skips ahead to specific poses. The shortcut is to nail the five universal adjustments first, because every pose below is a variation on these. The same person looks like a different category of professional depending on how each one lands.
Body angle: 30 to 45 degrees from the camera. A body squared to the camera reads as flat and confrontational. A body angled at 30 to 45 degrees creates depth and slimming through the shoulder line. For most people, 35 degrees is the sweet spot. Some industries (executive, legal) work with a smaller angle for gravitas; others (creative, hospitality) work with a larger angle for warmth.
Chin: slightly forward and slightly down. The instinct is to lift the chin. The fix is the opposite: push the chin forward (away from your neck) and tilt slightly down so your eye line is just below the camera lens. This single adjustment eliminates the double-chin shadow most amateur shots produce, and it sharpens the jawline.
Shoulders: dropped and relaxed. Most people unconsciously lift their shoulders toward their ears when they're being photographed. Drop them. The contrast between a tense and a relaxed shoulder line is dramatic. Try a deep exhale right before the shutter.
Lean: a small forward lean toward the camera. Two or three inches is enough. The lean reads as engagement. A pose with your body weight slightly back reads as detached. The lean doesn't change your facial expression; it changes how present you feel in the frame.
Eyes: direct contact with the lens. Not the screen. Not the photographer's eyes. The actual lens. For most professional headshots, direct eye contact is non-negotiable. The exception is the candid category below, where the off-axis gaze is the point.
A photo with these five right and nothing else right (no lighting, no background, no editing) still reads as competent. A photo with everything else right and these five wrong looks amateur regardless.
Pose 1: The Classic (head-and-shoulders, head-on)
The baseline. Body straight on or at a shallow 15-degree angle, head and shoulders cropped, direct eye contact, slight natural smile. This is the safest pose. It's also the most overused.
The Classic works when you need a photo that signals competence without making any specific claim. Default for corporate directories, ATS profiles, conference programs. It's the safest pose to ship if you're going to use one photo across many surfaces. The trade-off is that it doesn't differentiate you.
A useful variation: the Lean-In Classic, where the body stays head-on but you lean about three inches toward the camera. The small forward shift adds warmth without changing the basic composition. This is the version of Classic that earns its keep on LinkedIn.

Pose 2: The 3/4 Angle (the most universally flattering pose)
Body turned 30 to 45 degrees from the camera, head rotated slightly back toward the lens, eyes on camera. The 3/4 angle is the single most flattering pose for most faces. The angle slims the body line, the head rotation creates depth, and the asymmetry reads more naturally than a straight-on shot.
For most professionals across most industries, the 3/4 angle is the recommended default. It works for LinkedIn, About-page heroes, sales-collateral profiles, badges, and event programs. It photographs better than the Classic and reads as more considered than the Candid.
There are two directions to turn. Most people have a stronger side; if you don't know which is yours, take a few frames in each direction and pick. As a rough starting point, turn so your shoulder line forms an arrow pointing away from the camera.

Pose 3: The Power Pose (squared shoulders, gravitas)
A small departure from the 3/4 angle. The body squared more directly to the camera (15 to 20 degrees off, not 35), shoulders pulled back, chin slightly more forward, expression slightly more serious. The Power Pose communicates authority and decisiveness.
This is the default for C-suite leadership, legal, finance, board profiles, and any role where the headshot has to carry weight in a high-stakes context. The squared shoulders are the dominant cue. The expression is usually closed-mouth or a subtle controlled smile, not the warm open smile that works in approachability poses.
Crossed arms are a common Power Pose variation that works in editorial and case-study contexts but reads as closed in 1:1 sales conversations. Use crossed arms when the photo's job is to project leadership; skip them when the photo's job is to invite contact.

Pose 4: The Candid (natural micro-expression)
Off-axis gaze, natural laugh, a moment of looking down or to the side. The Candid pose captures a micro-expression instead of a held expression. It reads as warmer and more present than the Classic, and it's the dominant pose in 2026's editorial direction.
The Candid works in tech, startup, creative, marketing, and sales contexts where the brand permits warmth. It's the wrong default for legal, executive, or any role where gravitas is the job of the photo. A well-shot Candid feels like the person was caught between sentences in a conversation, not like they were performing a pose.
Two useful variations: the Hand-to-Face, where one hand rises to the chin, the side of the jaw, or rests at the glasses (reads as considered, intellectual, common in academia, consulting, and editorial), and the Looking Away, where the gaze breaks from the camera entirely (reads as candid and storytelling, works in lifestyle and content-creator photography).

Pose 5: The Editorial / Environmental (context as character)
Environment becomes part of the story. Bookshelves behind a writer. A workshop behind a craftsperson. Office context for a leader. Stage backdrop for a speaker. The Editorial pose uses the surrounding setting to communicate what the subject does without adding text.
This is the strongest pose when the role has visual character: realtor in front of a property, doctor in clinical setting, professor in a library, founder in their workshop. It's the weakest pose for ATS profiles and email signatures, where the environment is a distraction at thumbnail size.
Editorial poses photograph best in landscape orientation, so the subject sits in roughly the right third of the frame and the environment fills the left two-thirds. For LinkedIn or square-crop use cases, plan to crop after capture; the environmental context will be tighter but still readable.

Which pose fits your role?
Tech, startup, sales, marketing, hospitality: 3/4 Angle or Candid. Legal, finance, executive, board, medical: Power Pose or 3/4 Angle. Creative, design, content, education: Editorial / Environmental or Candid. Realtor, consulting, professional services: 3/4 Angle (universally flattering, role-flexible). We've got industry-specific guides for each one.
See the industry guidesHow to pose by yourself (the trick: capture multiple frames)
The hardest part of executing a pose is the gap between knowing what to do and doing it under the camera. Photographers in studio sessions solve this by talking subjects through hundreds of frames; DIY photographers don't have that scaffolding.
The fix is volume and variation. Plan three to four pose categories you want to try. For each category, capture 8 to 10 frames varying the body angle, head tilt, smile, and hand position slightly between each one. A 30-minute session at home should produce 30 to 40 frames; three or four will be actually usable.
A trick that works in solo sessions: set your phone's burst mode on a 10-second self-timer. Stand on a marked spot. The first three frames will look posed. The middle four will look more natural. The last three will look relaxed once you've stopped self-monitoring. The middle batch is usually the keeper. See the full home-capture guide for the rest of the setup.
Common posing mistakes that kill a headshot
The mistakes below show up in roughly half of DIY headshots and a quarter of professional ones. Each is a five-second fix if you know to look for it:
Square-on body, head-on stare. The "passport photo" pose. Body angle and head rotation are the easiest wins; both should land in the 15-45 degree range.
Lifted chin. Reads as defensive or pretentious. Chin forward and slightly down, every time.
Hands at mid-chest. Whether crossed, clasped, or floating, hands above the bottom of the frame fight the face for attention. Either crop them out or bring one to the face deliberately.
Held smile. A smile held for more than half a second reads as forced. Think of something actually funny right before the shutter.
Head tilt without purpose. A small head tilt softens authority and can backfire in legal or executive contexts. Use it deliberately; avoid it accidentally.
Eyes drifting off-camera. The Candid pose exception aside, eyes should land on the lens, not the photographer's face or the screen.
Tense shoulders. Drop them. A deep exhale right before the shutter usually does it.
What happens after you pose: enhancement, not generation
A great pose can carry a photo. It can't fix uneven lighting, a cluttered background, or a phone-camera color cast. Those are post-capture problems with post-capture solutions.
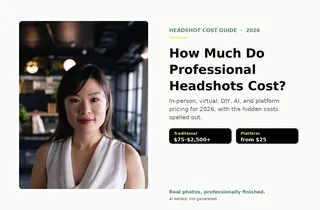
The choice is between editing it yourself and uploading to a headshot enhancement platform that handles the lighting balance, background cleanup, color correction, and sharpening for you. AI edited, not generated. You stay the person in the photo; the platform handles the production polish. Pricing starts at $25 per finished headshot, retakes included, and your first three credits are free.
The distinction matters because the alternative path (AI-generated synthetic headshots) produces images that look right but don't represent you. The pose you choose, the expression you hold, the slight head tilt that's specifically yours, those are signals that get lost when the photo is generated instead of enhanced. Pose well, capture cleanly, polish carefully. That's the sequence.

Frequently Asked Questions
What is the most flattering pose for a professional headshot?
The 3/4 Angle, with the body turned 30 to 45 degrees from the camera and the head rotated slightly back toward the lens. The angle creates depth and slimming through the shoulder line, the head rotation reads more naturally than a straight-on shot, and it works across nearly every industry. It's the safest answer for most faces and most roles.
Should I smile in my headshot, and if so, how much?
A subtle, natural smile reads as approachable and trustworthy. The strongest smiles come from thinking about something actually funny right before the shutter, not from holding a smile expression. Some roles (legal, executive) favor a closed-mouth confidence; others (creative, sales, hospitality) work better with an open smile.
How should I position my hands in a headshot?
Hands either stay below the frame (cropped at the shoulder line) or come up to the face deliberately. Hand-to-chin and hand-to-cheek poses read as considered. Avoid mid-chest crossed arms (defensive) and floating hands (no purpose). The simplest move is to keep them out of frame entirely unless you have a specific reason to include them.
Do men and women pose differently for professional headshots?
The five fundamentals are the same. The differences are usually subtle. Women often photograph better with a more pronounced body angle (35 to 45 degrees) because it creates depth without flattening. Men often hold a more squared posture with shoulders rotated less. The cues are individual more than gendered; pick the body angle that fits your shoulder line.
What's the best pose for a LinkedIn headshot?
The 3/4 Angle plus a soft natural smile and direct eye contact. LinkedIn profiles that follow this pattern outperform alternatives in profile views and message responses. See the LinkedIn-specific step-by-step guide for the full capture sequence.
How many poses should I try in one photo session?
Plan three to four pose categories across 30 to 40 frames total. Vary body angle, head tilt, smile intensity, and hand position between each setup. A 30-minute DIY session should produce one or two keepers out of 30 frames. A professional studio session typically produces two to four keepers from 80 to 200 frames.
Can a great pose fix bad lighting or background?
No. Lighting and background carry more weight than pose at thumbnail size. A perfectly-posed shot with overhead fluorescents and a cluttered background still reads as amateur. Get the lighting and background right first, then layer in pose adjustments.
Still have questions? Get in touch and we'll be happy to help!
One photo, every format you need
Capture a few different poses on your phone. Upload your favorite. Get a polished headshot with a clean background and every output format you need (square for LinkedIn, transparent PNG for badges, signature crop for email). Start free with three credits.